
Adjusting an ergonomic chair correctly can significantly enhance your comfort and productivity at work. This guide aims to walk you through the process of how to adjust an ergonomic chair for optimal comfort. By fine-tuning your chair’s settings, you can fully benefit from its ergonomic design. Knowing how to adjust an ergonomic chair for optimal comfort is important for your home office setup.

Achieving the perfect seat height is foundational in the quest for optimal comfort and ergonomics in any workspace. The correct seat height supports proper posture, enhances blood circulation, and prevents the discomfort associated with prolonged sitting. Here’s a closer look at how to adjust your chair to find that ideal height.
The right seat height is crucial for maintaining a neutral body position. When your feet are flat on the ground and your knees are bent at a 90-degree angle, your lower body forms a stable base that supports your upper body’s posture. This position prevents strain on your legs, back, and even your neck, contributing to an overall healthier sitting posture.
Even after you’ve adjusted the seat to the recommended height, it’s important to fine-tune it based on your body’s feedback. Spend some time working in this position and note any discomfort or strain. Minor adjustments over the first few days can lead to significant improvements in comfort.

Remember, setting the ideal seat height is just one part of creating an ergonomic workspace. Combine this with proper desk height, monitor positioning, and supportive accessories like footrests if your feet don’t comfortably reach the floor even at the correct seat height. Together, these adjustments work synergistically to enhance your overall comfort and prevent work-related strains.
By meticulously adjusting your seat height and combining it with other ergonomic practices, you create a workspace that not only boosts comfort but also productivity and well-being. This foundational adjustment is a key step in optimizing your work environment for long-term health benefits.
Next, consider the seat depth. It affects how well your thighs are supported. A gap of about two fingers between the seat’s edge and the back of your knees is ideal. If adjustable, slide the seat until you find a comfortable position that supports your entire thigh without pressing into the back of your knees.

Lumbar support plays a pivotal role in maintaining the health and comfort of your lower back, especially during long periods of sitting. An ergonomic chair with adjustable lumbar support can significantly reduce the strain on your back by ensuring that the natural curve of your spine is supported. Here’s how to tailor this crucial feature for maximum benefit:
The lumbar region of your spine naturally curves inward towards your abdomen. This curve needs proper support when you’re sitting; otherwise, the muscles around your spine bear the extra load, leading to discomfort or pain over time. Adjustable lumbar support on an ergonomic chair fills the gap between your lumbar spine and the chair, maintaining the spine’s natural curve and preventing slouching.
While customizing your chair’s lumbar support is crucial, maintaining overall good sitting posture is also essential. Ensure your feet are flat on the floor, knees at a 90-degree angle, and your shoulders relaxed but upright. Pairing lumbar support with other ergonomic adjustments, like seat height and armrest positioning, creates a comprehensive sitting strategy that protects your spine and enhances comfort.
Proper lumbar support does more than just make sitting more comfortable—it can have significant long-term benefits for your spinal health. By supporting the natural curve of your lumbar spine, it reduces the risk of lower back pain, one of the most common complaints among office workers. Furthermore, with the spine properly aligned, you’re likely to experience less fatigue, improved concentration, and overall better work performance.
Customizing the lumbar support of your ergonomic chair is a critical step in creating a workspace that fosters health, comfort, and productivity. By taking the time to adjust this feature to fit the unique contours of your spine, you invest in your well-being, ensuring that your work environment supports your body’s needs.
The backrest angle supports your upper body and allows flexibility. A good backrest follows the natural spine curvature and offers slight recline flexibility. Adjust the angle so it comfortably supports your back while sitting upright. This should not force you into a slouched position.
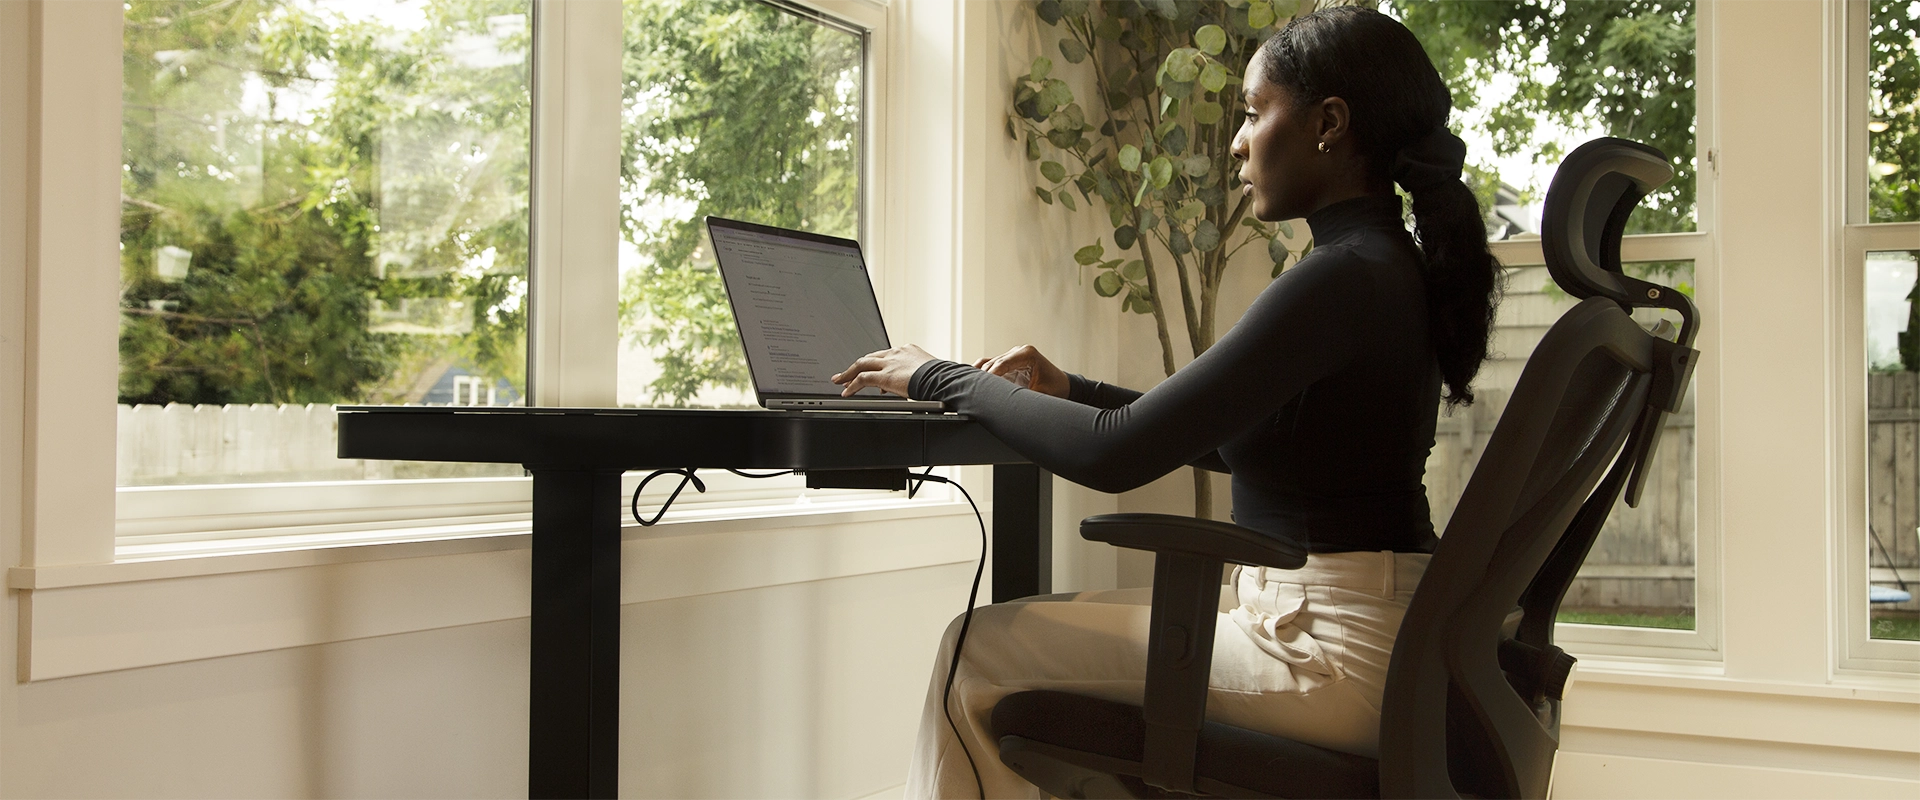
Armrests provide support for your arms, reducing shoulder strain. Adjust the armrests so your shoulders remain relaxed, and your elbows form a 90-degree angle. This position helps prevent shoulder hunching and supports ergonomic keyboard use.
If your chair allows for armrest width adjustments, ensure they’re set to comfortably accommodate your arms. Properly adjusted armrests encourage a natural arm position, supporting your shoulders and preventing them from stretching or squeezing uncomfortably.
A chair’s tilt tension controls the resistance you feel when leaning back. Adjust this tension to balance support and mobility. Find the tension adjustment knob and turn it to your preference, allowing for comfortable reclining without feeling too loose or rigid.
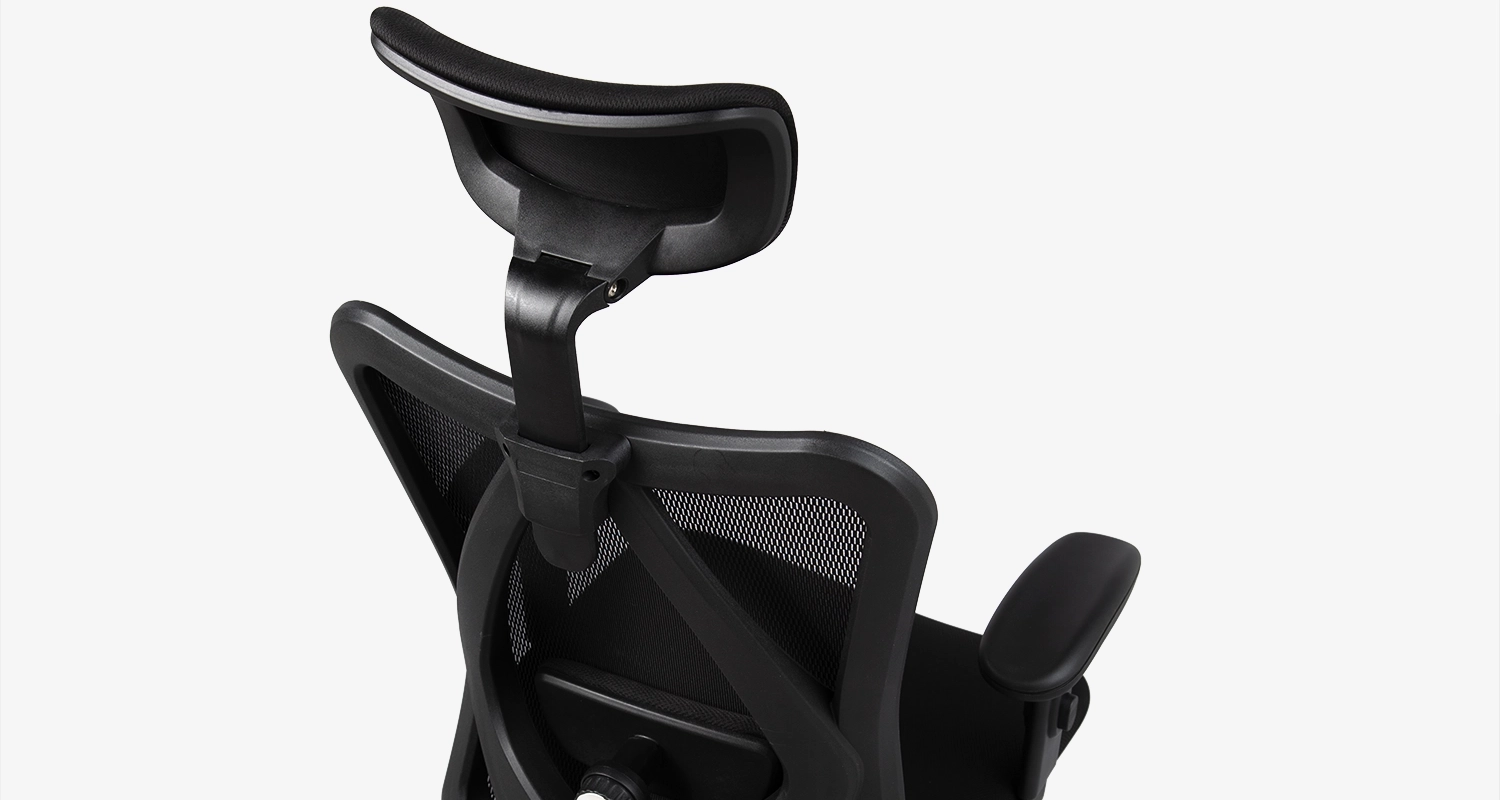
Chairs with headrests offer extra support for your neck and head. Adjust the headrest so it aligns with the back of your head without pushing it forward. This supports a neutral neck position, crucial for long periods of sitting.
After making these adjustments, spend time sitting in the chair. Assess how your body feels. It’s normal to make several small tweaks to get everything just right. Comfort and support should be your guiding principles.
Mastering how to adjust an ergonomic chair for optimal comfort is key to a healthier, more productive workspace. Each adjustment plays a role in supporting your body’s natural posture and minimizing strain. By investing time in fine-tuning your ergonomic chair, you’re investing in your comfort and well-being throughout your workday.